
English
One client, several hubs
Your laptop or phone joins a second hub here, such as a hub at the office beside the one at home, and then lists the services of both side by side. Each hub keeps its own name, its own way in, its own permissions for this client and its own panel.
Before you start
- Each hub has done the Step zero on its own box.
- The client is installed and joined to the first hub, as Install a client describes.
Name each hub
The client titles each hub's row with the hub's name, which starts as the box's hostname. On each hub whose name is unclear:
- In the hub's panel, open Settings.
- Under Hub name, type a name in Name, such as
office. - Select Apply name.
Make a link on the second hub
- In the second hub's panel, open Clients.
- Select New client link.
- Type a name for the device.
- Select Create link.
The link is valid for 30 minutes. After the join, this hub's Clients page alone sets what the client can use here.
Join the second hub
On a computer
- In the client window, open Hubs.
- Paste the link into the field of the Join a hub row.
- Select Join.
On a phone
- In the app, on Hubs, select Join a hub.
- Point the camera at the QR code on the second hub's Clients page.
Read the Hubs page
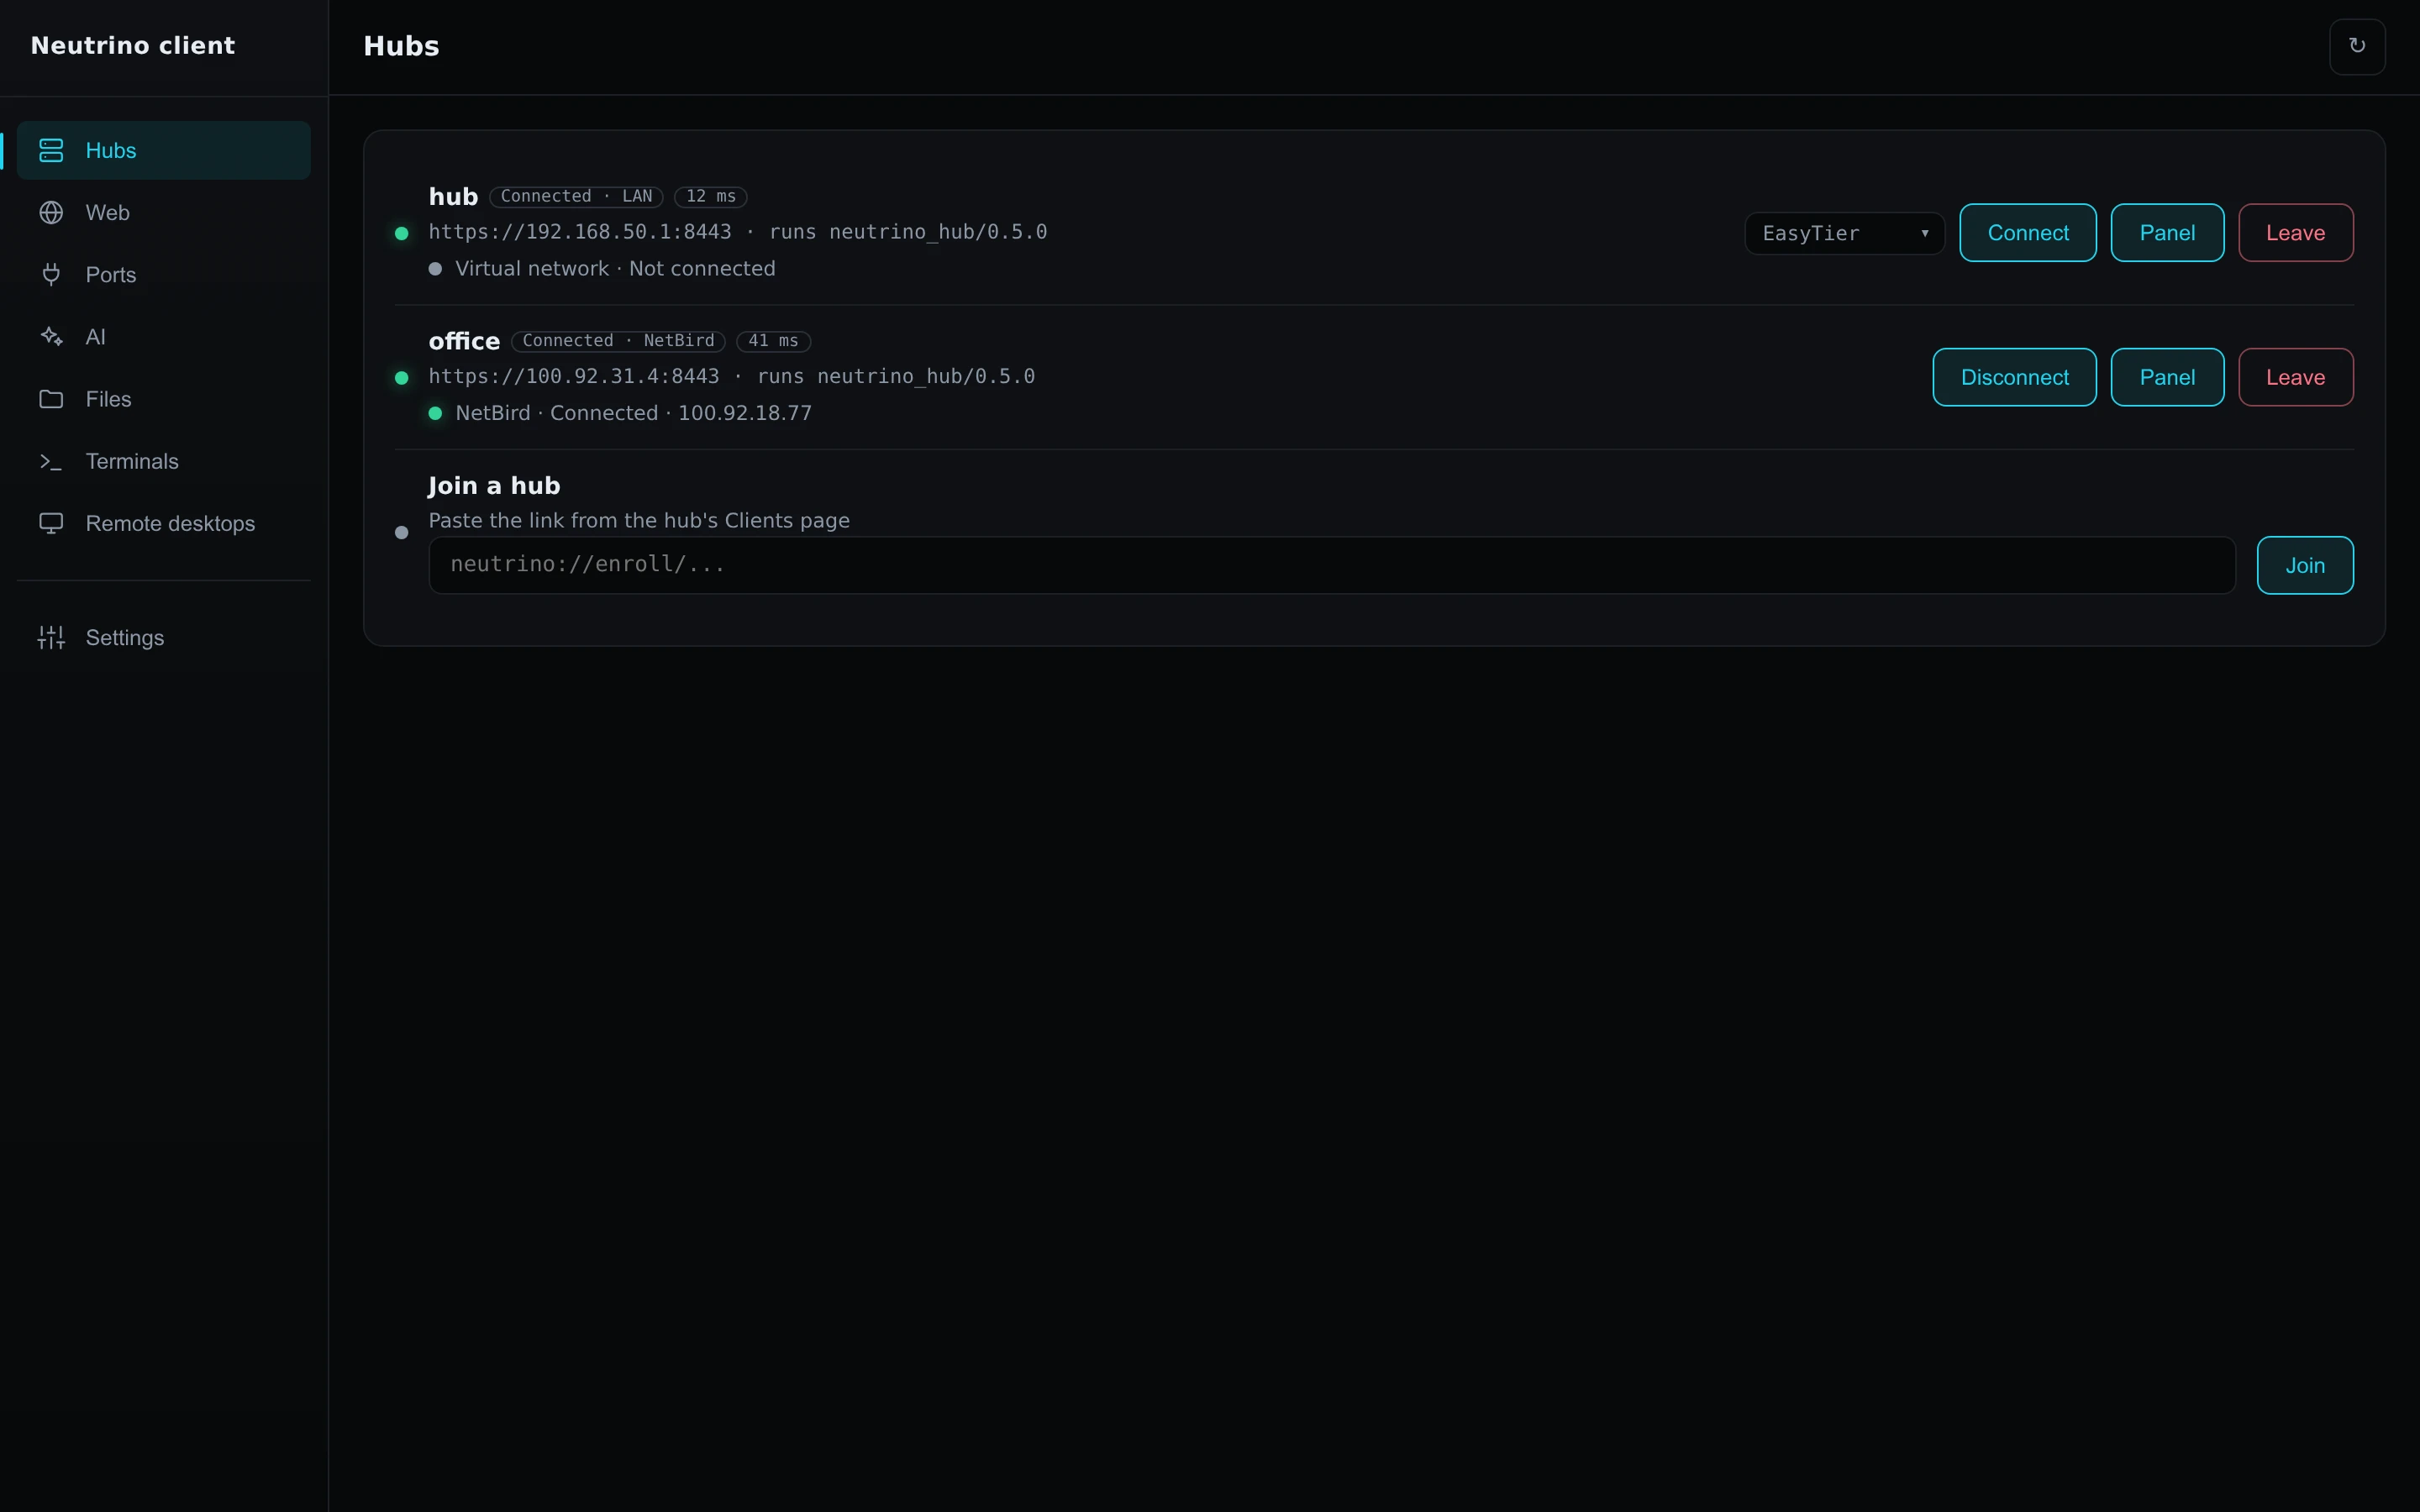
Hubs has one row per hub, titled with its name. Each row reads Connected · with the way the client reached that hub, LAN, Direct, NetBird, EasyTier or SSH Relay, and the round trip in milliseconds.
The client picks the way for each hub separately, so hub can read Connected · LAN while office reads Connected · NetBird. A hub reached over the LAN, through Direct or through the SSH Relay works while its virtual network is off.
Find each hub's services
Web, Ports, AI, Files, Terminals and Remote desktops list the entries of every connected hub, in the order of the rows on Hubs. Each entry has a line that names its hub, its machine and its module, in that order: from hub:server:Gitea is the Gitea module on the machine server of the hub hub.
A hub that is not connected takes one row there, with its name and state line, until it connects.
On Terminals, the strip at the top holds the machines of every connected hub, and the line under it names the picked machine's hub.
On Windows, a drive letter on Files keeps naming the same machine of the same hub.
Switch virtual networks
A device is on one hub's virtual network at a time, a computer as much as a phone. While one hub's line is on, Connect on every other hub's line is greyed. To move to the other hub's network:
- On the first hub's row, select Disconnect on the Virtual network line.
- On the second hub's row, select Connect.
The first hub stays connected through any other way in it has, such as Direct or the SSH Relay.
Choose the AI gateway
On a computer, AI has one entry for each hub with an AI gateway. Select The AI tools use this gateway on the hub you want; the switch on the other entry turns off.
That hub's row on Hubs then reads The AI tools point at this hub. On a phone, each gateway has its own Connect, as Android app describes.
Open each hub's panel
Panel on a row opens that hub's panel in the browser, signed in. The button appears only when that hub's Clients page gives this client Hub panel without the password.
On Linux and Windows, each hub's panel opens at its own .localhost name, so the two sign-ins stay apart. On macOS both panels open on 127.0.0.1, and signing in to one can sign out the other; Panel signs in again.
Leave one hub
- On the row of the hub to leave, select Leave.
- Select Press again to leave.
The row goes, and the client stops that hub's forwards, mounts and viewers. Its virtual network goes off unless another hub uses the same network. The other hub's row and virtual network stay as they are.
In a terminal, leave, terminal and the service subcommands take --hub with the hub's name while several hubs are joined, as nclient commands lists.
When a row reads anything but Connected, The state line of a hub row lists each line with its fix.