
English
Reach home through your own VPS
On a VPS you rent, the hub opens a public port with a reverse SSH forward and connects it to port 8443 at home. A client away from home dials that public port, and the connection stays encrypted from the client to the hub. The hub signs in to the server with an SSH key or a password.
Before you start, you need:
- A server with a public address that runs OpenSSH, where you have root to edit the SSH configuration.
- A provider whose terms allow forwarding traffic. Some providers limit or forbid it.
Make an SSH key pair
A key is the safer choice, since the server then limits it to one listener. If you sign in with a password instead, skip this section.
On your home computer, in a terminal with OpenSSH, make a key pair without a passphrase:
bashssh-keygen -t ed25519 -N '' -f relay_keyIn the panel, open the Credentials page and select Add key under SSH keys.
Type a Name, such as
relay.Paste the contents of
relay_keyinto Private key.Select Save key.
Set up the server
These steps run on the server, as root. The example account is relay and the example public port is 8443. If you pick another public port, use it in every step; the hub's own port stays 8443.
Create the account the hub signs in as:
bashuseradd --create-home --shell /usr/sbin/nologin relayWith a key, add the public key to the account's
authorized_keys, limited to one listener. Replace<public-key>with the line fromrelay_key.pubon your home computer:bashmkdir -p /home/relay/.ssh echo 'restrict,port-forwarding,permitlisten="8443" <public-key>' >> /home/relay/.ssh/authorized_keys chown -R relay:relay /home/relay/.ssh chmod 700 /home/relay/.ssh chmod 600 /home/relay/.ssh/authorized_keysWith a password instead, give the account one, and let that account alone sign in with a password:
bashpasswd relay printf 'Match User relay\n PasswordAuthentication yes\n' > /etc/ssh/sshd_config.d/20-neutrino-relay-password.confLet forwarded ports listen on the public address, then restart the SSH server. On Fedora, RHEL and Arch the service is
sshdinstead ofssh:bashecho 'GatewayPorts clientspecified' > /etc/ssh/sshd_config.d/10-neutrino-relay.conf systemctl restart sshOpen TCP port
8443in your provider's console and in any firewall on the server. The hub must also reach the server's SSH port, 22 by default.
The GatewayPorts setting applies to the whole server.
Connect the hub
- If you use a password, open the Credentials page and add it under Logins with Add login.
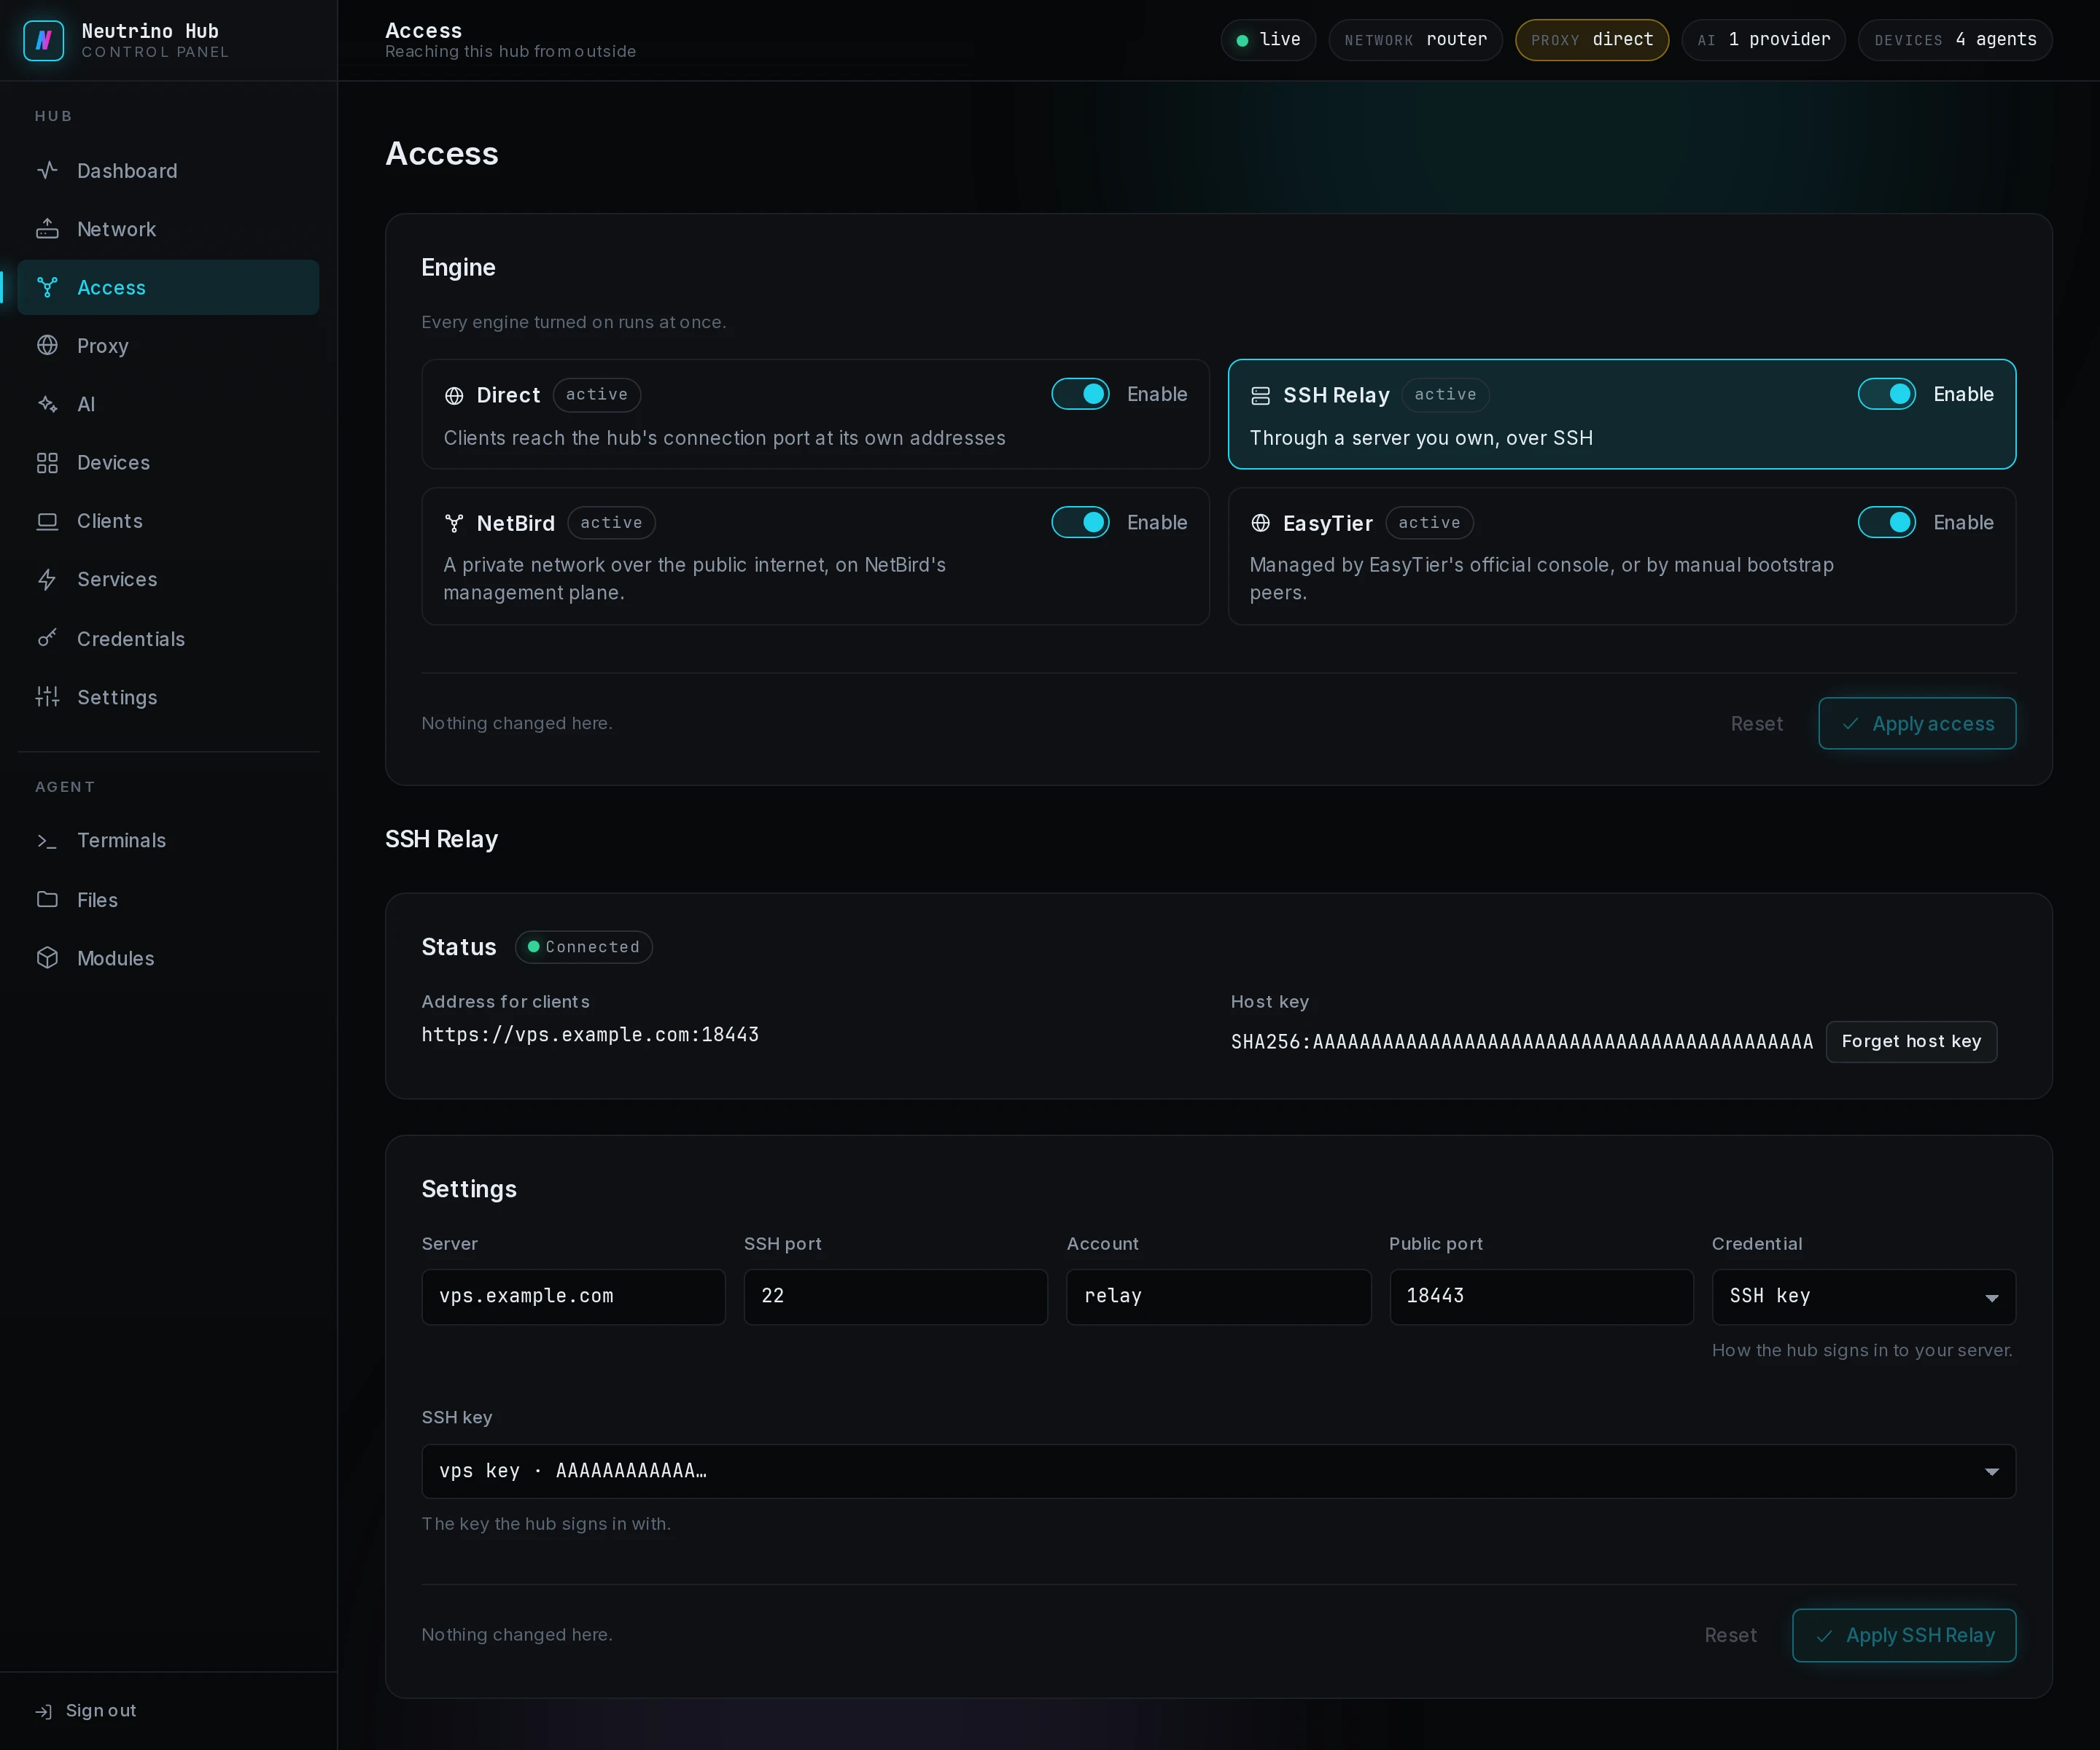
- On the Access page, turn on Enable on the SSH Relay card.
- Select Apply access. The SSH Relay section appears under the cards.
- Under Settings, fill Server, SSH port, Account and Public port.
- Under Credential, choose SSH key and pick the key, or Password and pick the login.
- Select Apply SSH Relay.
Status reads Connecting, then Connected within a minute. Address for clients shows https://<server>:<public-port>, built from the Server and Public port you entered.
Give clients the address
Every client that already joined gets the relay's address with its next state from the hub, and every new client link holds it. Agents get it in their address list too.
To check it from a phone:
- Turn off the phone's Wi-Fi.
- Open the Hubs page in the app.
The hub row reads Connected · SSH Relay. A connected virtual network comes first, so while NetBird or EasyTier is on, the row names it. To test the relay alone, or to use it in place of NetBird, turn the NetBird card off on Access and select Apply access.
If Status reads anything other than Connected, read SSH Relay for what each status means. The fixes are in Troubleshooting. To stop using the relay, turn the SSH Relay card off and select Apply access.